
Add Custom Four Column Footer in Blogger

When I started my blog on blogger few blogger told me that you should choose some SEO Friendly Blogger Template then one of my friend send me link of free and SEO friendly Blogger templatebut what was the problem with that one is there is no footer in that Blogger Template. As we all blogger wants minimum 3 Columns in Footer Area because we have set so many blogging related this such as Social Media Widget, Categories, Author Bio Detail etc, but I have seen so many widgetwhich are without footer or having just one column in the footer. For that I have decided to share this article how to add Customs Footers or in your blogger Template. In this post I will give you such codes and guide from which you can easily install four column footer in few seconds.
Related Articles:-
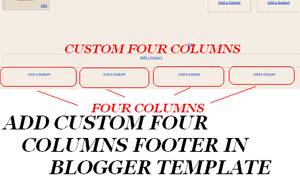
How to Add Custom Four Column Footer in Blogger Template.
For installation of Custom Four Column widget we have to modify or add some codes in Blogger Template so you must backup your blogger template then start work.
Go to Blogger Dashboard >> Tempalte >> Edit HTML >>
/* --- Starts @ Razlogs--- */
/* --- CSS by: M Ehsan--- */
#lower {
border-top:10px solid #F781F3;
margin:0 0 10px 0;
-moz-border-radius-bottomleft:10px;
-moz-border-radius-bottomright:10px;
}
#lower-wrapper {
margin:auto;
padding: 0px 0px 20px 0px;
width: 960px;
background: #FBEFF5;
-moz-border-radius-bottomleft:10px;
-moz-border-radius-bottomright:10px;
-webkit-border-bottom-left-radius:10px;
-webkit-border-bottom-right-radius:10px;
}

#lowerbar-wrapper {
float: left;
margin: 0px 0px 0px 0px;
padding: 10px 0px 0px 0px;
width: 25%;
text-align: justify;
font-size:100%;
color:#333;
line-height: 1.6em;
word-wrap: break-word; /* fix for long text breaking sidebar float in IE */
overflow: hidden; /* fix for long non-text content breaking IE sidebar float */
}

.lowerbar {
margin: 0;
padding: 0;
}

.lowerbar .widget {
margin: 0;
padding: 10px 20px 0px 20px;
}

.lowerbar h2 {
background:#F781F3;
-moz-border-radius-bottomleft:6px;
-moz-border-radius-bottomright:6px;
-webkit-border-bottom-left-radius:6px;
-webkit-border-bottom-right-radius:6px;
margin: -10px 0px 10px 0px;
padding: 3px 0px 3px 0px;
text-align: center;
color:#fff;
font-size:16px;
font-weight:bold;
text-transform:lowercase;
}

.lowerbar ul {
margin: 0px 0px 0px 0px;
padding: 0px 0px 0px 0px;
list-style-type: none;
}

.lowerbar li {
margin: 0px 0px 2px 0px;
padding: 0px 0px 1px 0px;
border-bottom:1px dotted #<span style="color: #ff0000;">DF0101</span>;
}

.lowerbar a {
color: #<span style="color: #ff0000;">FA58F4</span>;
text-decoration: none;
}

.lowerbar a:hover {
text-decoration: underline;
color: #<span style="color: #ff0000;">F7BE81</span>;
}

.lowerbar a:visited {
text-decoration: none;
color: #<span style="color: #ff0000;">5858FA</span>;
}
/* --- CSS by: M Ehsan tipstricksisland.com--- */
/* --- End @ Razlogs--- */
Below is the CSS code and Paste this code just above the ]]></b:skin> closing tag
All Red Highlighted text are color codes for this footer colounms, you can you your own colour scheme.
Now find <div id=’footer-wrapper’> and paste the below HTML code Before <div id=’footer-wrapper’>
<div id='lower'>
<div id='lower-wrapper'>
<div id='lowerbar-wrapper'>
<b:section class='lowerbar' id='lowerbar1' preferred='yes'>
</b:section>
</div>

<div id='lowerbar-wrapper'>
<b:section class='lowerbar' id='lowerbar2' preferred='yes'>
</b:section>
</div>

<div id='lowerbar-wrapper'>
<b:section class='lowerbar' id='lowerbar3' preferred='yes'>
</b:section>
</div>

<div id='lowerbar-wrapper'>
<b:section class='lowerbar' id='lowerbar4' preferred='yes'>
</b:section>
</div>

<div style='clear: both;'/>
</div> </div>
Save your template and go to layout section of your blogger template.
Hope you have easily installed custom four columns in your blogger template.


Comments